The Benefits of Raw Butter
If you have heard of raw butter, you might be wondering what it is and how it differs from conventional store-bought butter. There is growing evidence that raw butter contains a range of health benefits that aren’t found in varieties of pasteurised butter. Raw butter is a great source of enzymes, probiotics, vitamins, and minerals that are often lost during the pasteurisation process. Nonetheless, raw butter is not without controversy, and some critics have voiced their concern that the risk of contamination from disease-causing bacteria and viruses simply can’t be ignored. This article therefore aims to explore what raw butter is: why it is called “raw”, its history, the benefits, and the possible risks of consuming it, and how best to purchase raw butter for yourself.
What is raw butter and how is it made?
In simple terms, raw butter is made from raw heavy cream that hasn’t been pasteurised or had other artificial chemicals or additives put in. The basis for making raw butter is the cream that rises to the top of unpasteurised raw milk. The cream is separated from the milk and placed in a butter churner where it is whipped for over half an hour until it turns into butter. Throughout the churning process, the cream is kept at room temperature to ensure the butter retains its natural healthy bacteria and enzymes. Natural salt may optionally be added to the raw butter as a preservative as this does not harm the healthy bacteria. However, both salted and non-salted varieties of raw butter are available.
The nutritional benefits of raw butter
Raw butter has many health benefits that are lost when the butter is pasteurised. Among the nutritional benefits of raw butter over pasteurised butter are:
- Raw butter contains lauric acid, which can help with digestive issues and reduce the symptoms of infections like candida.
- It helps prevent the formation of cancer cells as it has a high number of antioxidants.
- Contains natural vitamin D content that helps the body facilitate the absorption of calcium and therefore improve eye and bone health.
- Is a rich source of vitamin A and iodine which help to keep the thyroid healthy and functioning well.
- Contains vitamin E which helps the body fight heart disease, neurological conditions such as Alzheimer’s disease, and cancer.
- Features vitamin K which reduces bone loss and helps improve bone health.
- Includes vitamins and bacteria that help boost the body’s immune system.
- Helps to cut down the risk of tooth decay and cavity formation.
- Contains healthy fats that help disperse hormones throughout the body and improve endocrine health.
- Strengthens the body’s organs and glands as well as the eyes and arteries while also improving the look and health of your complexion.
- Raw butter often develops stronger bacteria and cultures as it ages. Although it develops a sour taste it does not go bad and can be even more beneficial to the body.
The differences between raw and pasteurised butter
The only real difference between raw and pasteurised butter is that the former has not undergone the pasteurisation process. Pasteurisation is used to eliminate harmful germs and viruses and was developed by French scientist and microbiologist Louis Pasteur in 1822. During the butter-making process, raw milk is heated to temperatures ranging from 65 to 75 degrees Celsius for up to 30 minutes. Using this method is useful for removing bacteria that may cause illness or injury if consumed. However, pasteurisation has the disadvantage of destroying many important microorganisms necessary for health and nutrition. To keep raw butter safe and free of contamination, dairy farmers must utilize other techniques and safety regulations in lieu of pasteurisation. Almost all butter sold in shops or supermarkets is pasteurised, although a few shops and producers make raw butter.
The controversy surrounding raw butter and its safety
There has been a significant amount of debate surrounding raw butter ever since the nineteenth century. At the time, dairy production environments were typically unclean, and health regulations in the industry were inadequate. As a result, animals became ill and produced milk tainted with viruses and deadly germs, which were then passed on to everyone who consumed it, frequently resulting in severe illness epidemics that took many lives.
As pasteurisation became commonplace in milk production, the threat of health risks such as TB transmission from animals to humans decreased. When it comes to producing raw milk and butter these days, dairy farmers are now required to adhere to considerably stronger health and safety protocols. There are however always potential health risks, and so it is always advisable for children to avoid raw butter and for those who have weak immune systems, are pregnant or nursing, elderly, or have chronic diseases.
However, raw butter, when manufactured and handled carefully, offers numerous health benefits simply not available in pasteurised butter. The notion of raw butter being inherently dangerous is now out of date, and when manufactured and handled with all due care, raw butter can be a very healthy alternative.
How to find and buy raw butter
In the United Kingdom, raw butter cannot be purchased from a store or supermarket. Instead, it must be purchased directly from a dairy farm. These dairy producers are required to comply with rigorous labelling regulations and submit to frequent health and safety tests before they may sell raw goods. To purchase raw butter for yourself, you will either visit the farm where it is made or use a milk delivery service, such as Foulgers Dairy. At Foulgers, we have an agreement with Fen Farm Dairy to supply and distribute their raw milk and butter directly to clients.
For more information about our products and services, please visit our online shop or contact us today.
WHAT IS THE ‘BUTTER BOARD’ TREND AND SHOULD YOU TRY IT?
Perfect for Festive Feasting if you’re hosting this season!
This delicious trend has whipped up a viral sensation on TikTok, but what is a butter board? Initiated by Brooklyn-based food influencer Justine Doiron, a butter board looks to fulfil the same need as a charcuterie board, it requires no cooking, looks fancy, and is extremely photogenic.
This appetiser-friendly dish is simple to create and perfect for a busy calendar of events leading up to Christmas and the New Year. To begin your perfect butter board, you start by spreading a pack of butter, not too cold, across a board, then sprinkle on tasty toppings. Toasted almonds, roasted garlic, honey, chilli flakes, fresh herbs, and fragrant citrus zest are some of our favourites.
If that sounds delectable to you, you’re not alone! Since Justine posted her short video, the hashtag #ButterBoard has racked up over 180m views, and thousands of people have put together their own.
HOW DO YOU EAT A BUTTER BOARD?
A butter board may look perfect to snap of photo of as it’s served, but that won’t last for long because these picture-perfect creations are meant to be destroyed by foodies! To get the smorgasbord of butter and toppings into your mouth you can either scoop it up with a knife and smear it on your bread, or dive right in and dredge your bread – or radish, celery, crackers etc – through the artful arrangement.
THE PERFECT BUTTER
When it comes to a butter board the most important ingredient is, you guessed it, the butter! When we’re crafting the perfect appetiser for family and friends, we recommend you use only the best from a happy herd of grass-fed Montbeliarde and Friesian cows: : Bungay Raw Butter from Fen Farm Dairy.
Packed in its own beautiful wooden box, Bungay Raw Butter is the UK’s only raw farmhouse butter produced by using a lactic culture. It is made by hand on the farm in the traditional way, by souring the cream using a cocktail of lactic bacteria, before churning and hand-paddling with traditional scotch ‘butter hands’ made from wood. It is the closest thing to the original Suffolk butter. Milk is used warm from an ancient breed of grass-fed cows, hand- picked from small farms in the Jura region of France. They only give a small amount of milk, but it is rich and high in protein, producing beautifully creamy and complex flavours.
Bungay Raw Butter is a true farmhouse butter.
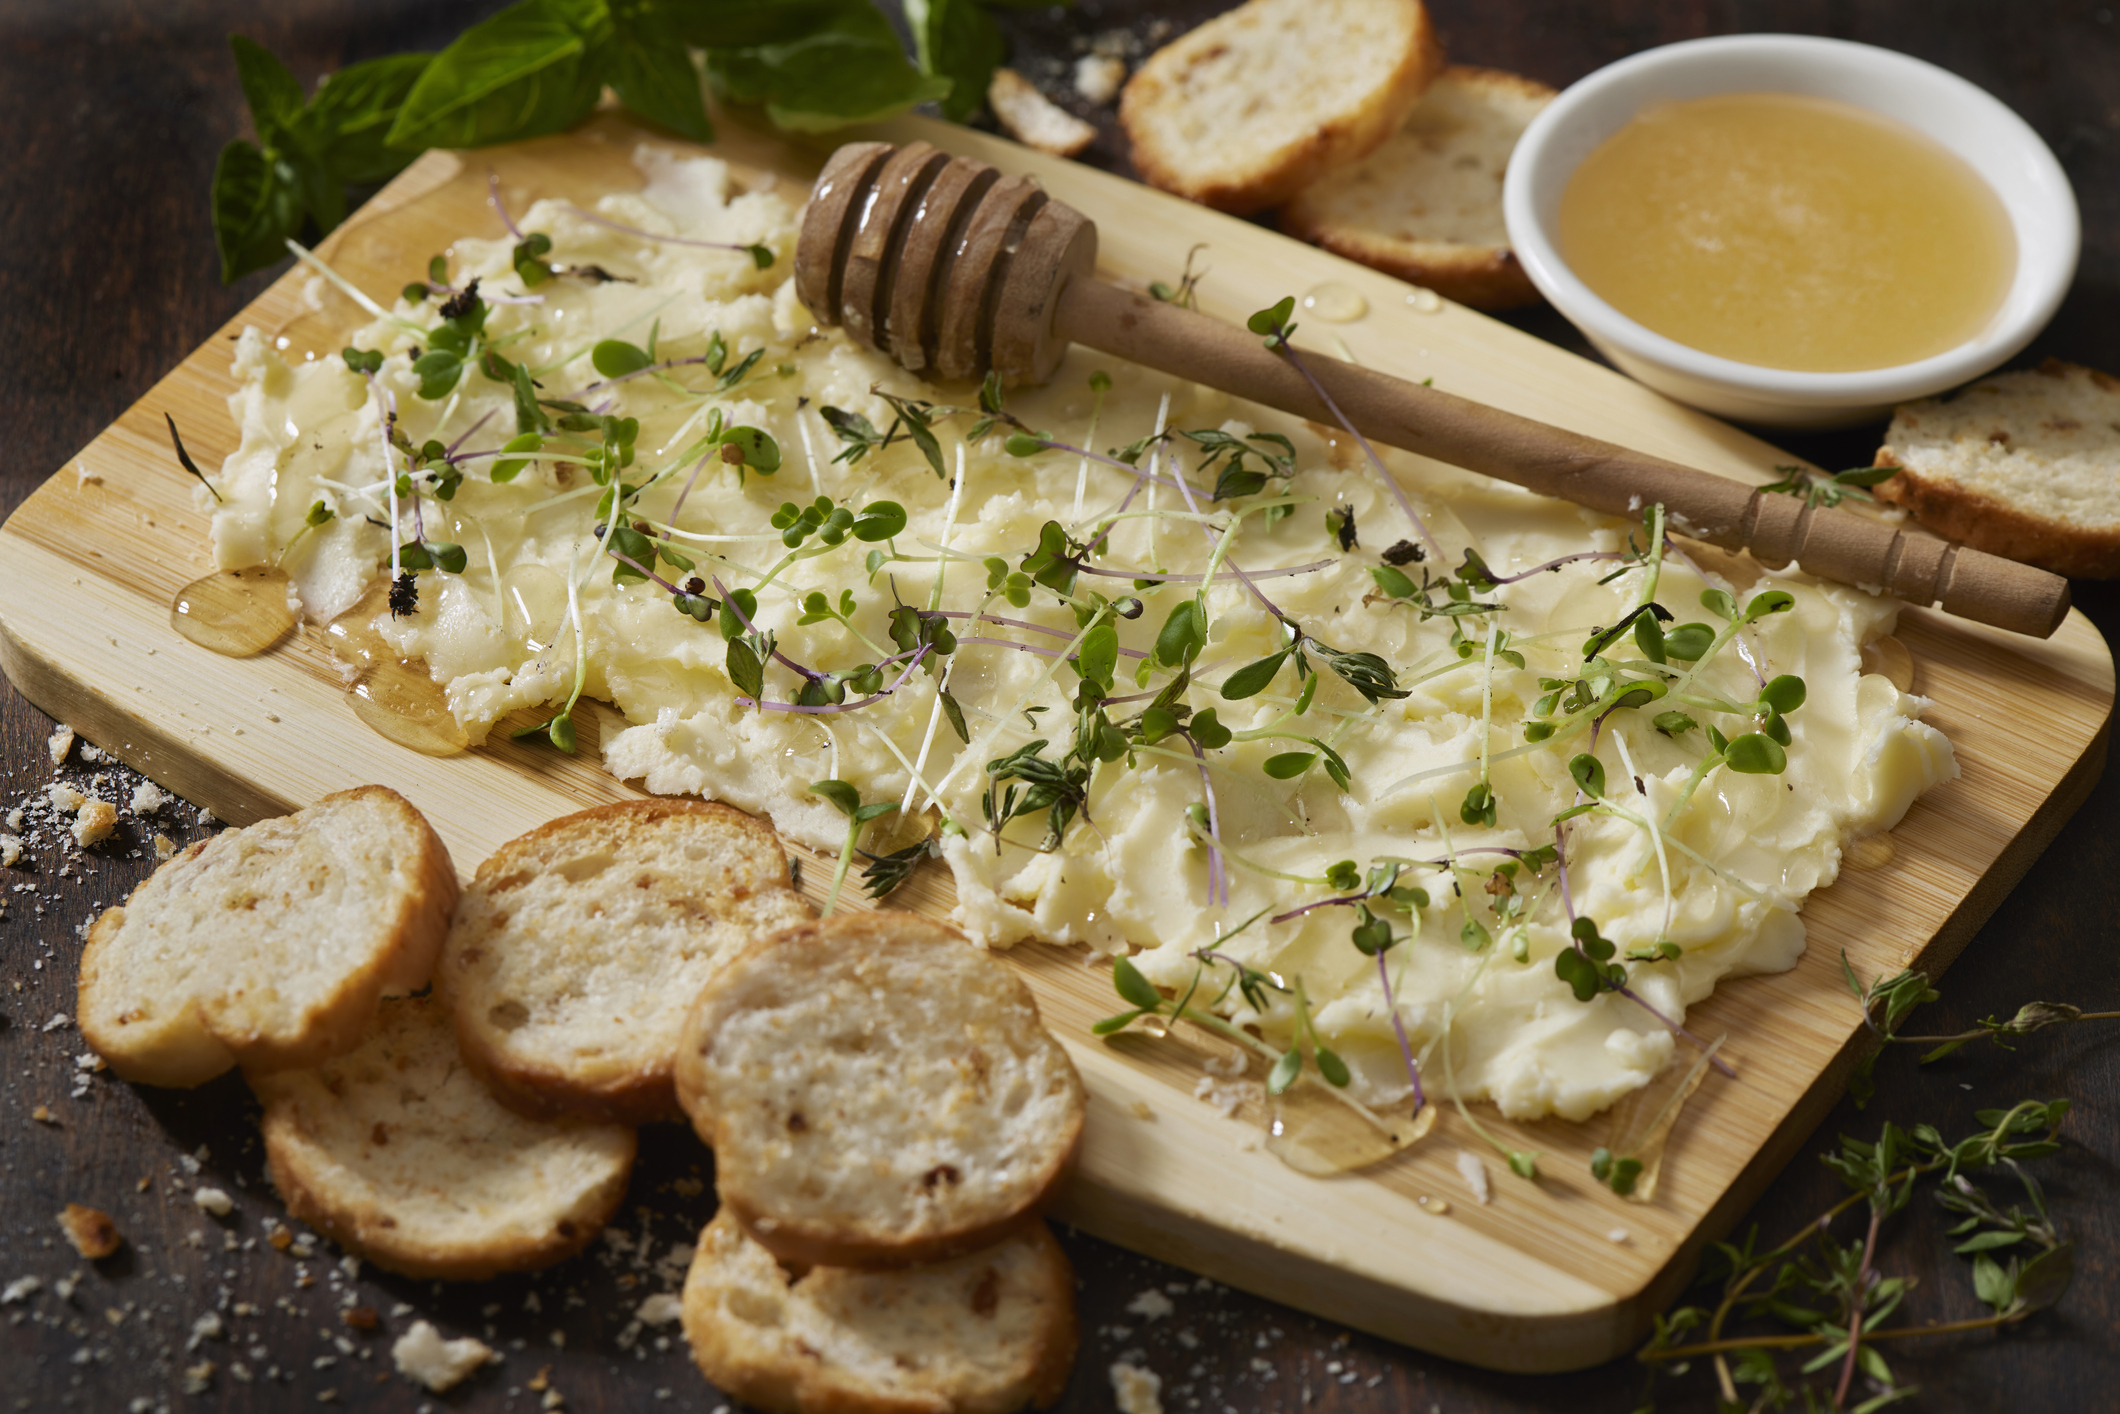
The Viral Butter Charcuterie Board with Fresh Herbs, Micro Greens, Organic Honey and Toasted Baguette Slices
IDEAS FOR YOUR FIRST BUTTER BOARD
Hop on the trend and create your own butter board this festive season. There’s an infinite way of combining complex flavours based on your preferences, here’s a few tasty combinations to try:
· drizzle of chili crisp and thinly sliced green onions
· pickled red onion, fresh tarragon, fresh parsley, thinly sliced chives, and sea salt flakes
· dried peaches, dried tangerines, and dried strawberries with honeycomb
· diced chorizo, dollops of whole grain mustard, chopped apricots, crushed almonds, and a drizzle of honey
Of course, if you’re a cheese lover, you’ll also want to add slices of delicious cheese either on the butter board itself or as an arrangement on as a side dish:
· Strathdon Blue – The cheese is evocative of a milder version of Stilton, with a spicy taste but many blue veins. Since the milk is rich in butterfat and protein, it gives the cheese a rich, creamy texture and a luscious, mellow yet aromatic taste/aroma.
· Barbers Farmhouse Vintage – Barber’s Farmhouse Vintage Cheddar is one of the only cheddars in the world with PDO-accreditation. Made with traditional starter cultures, West Country milk and using age-old methods, it’s typically matured for 18 months. Full-bodied and complex.
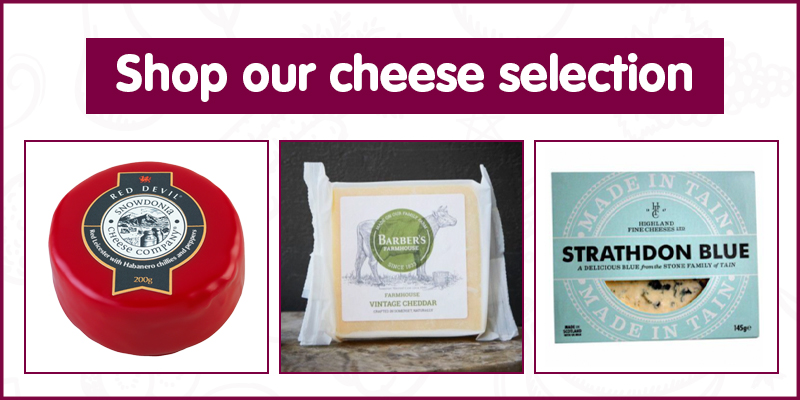
These palatable recipes are perfect to serve with crusty bread, crackers, radishes, or toasted English muffins or crumpets, to explore more cheese in the Foulgers Dairy shop.
DELIVERY FROM FOULGERS DAIRY
Start your perfect butter board today with Foulgers Dairy. We offer a doorstep delivery on selected products free of charge within Suffolk (see map here), including other household and grocery essentials. Our aim has always been to supply a wide range of goods locally sourced where possible and provide a quality service that meets our customer’s needs.
Creating a Healthy Workplace Environment: The Role of Dairy Deliveries
The Importance of Workplace Wellness
In today’s fast-paced corporate world, employee wellness has emerged as a critical focus for companies aiming to foster productivity and satisfaction among their workforce. A well-rounded wellness program can significantly impact the overall health and happiness of employees, reducing absenteeism, enhancing engagement, and improving morale. Providing access to nutritious options, such as regular deliveries of fresh dairy products, is a simple yet effective strategy to support these wellness initiatives.
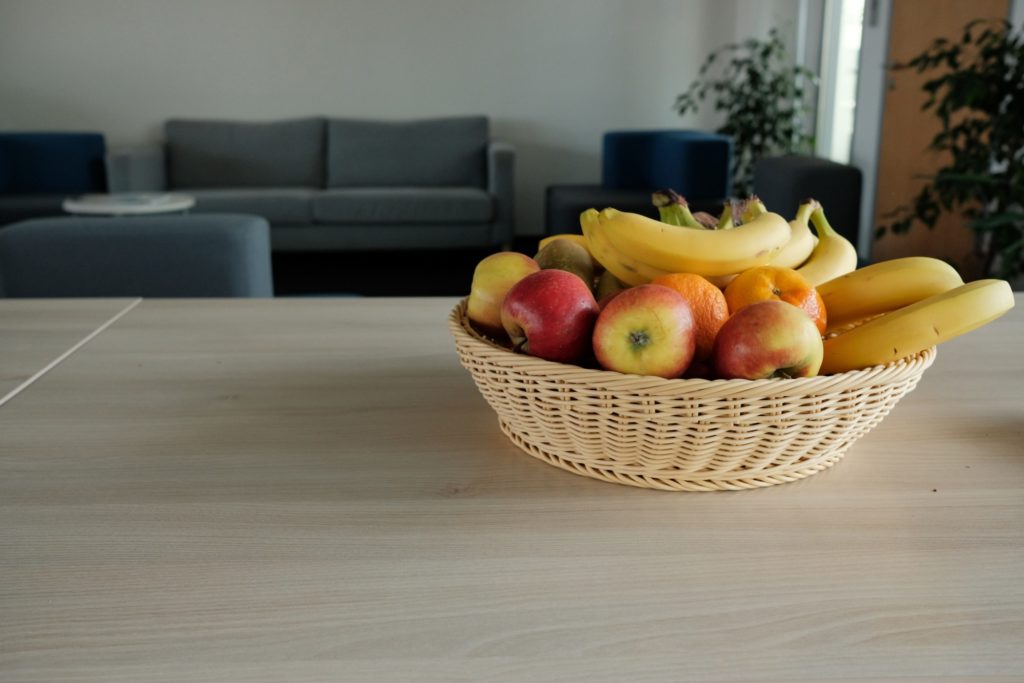
The Benefits of Dairy Deliveries in the Workplace
Incorporating dairy deliveries into the workplace offers numerous advantages, contributing to both employee health and convenience:
- Nutritional Benefits: Dairy products like milk, yogurt, and cheese are rich in essential nutrients, including calcium, vitamin D, and protein. These nutrients are vital for maintaining healthy bones, supporting muscle function, and boosting overall immunity. By providing easy access to these nutritious options, employers can encourage healthier eating habits among their staff.
- Convenience and Accessibility: Regular dairy deliveries ensure that employees have consistent access to fresh, high-quality dairy products without the need for them to bring these items from home. This convenience can be especially beneficial for busy professionals who might skip breakfast or snacks, leading to decreased energy levels throughout the day.
- Enhanced Employee Morale: Offering complimentary or subsidised dairy products can be seen as a thoughtful perk that shows the company cares about its employees’ well-being. This can enhance job satisfaction and foster a more positive attitude towards the employer.
- Supporting Local Suppliers: Partnering with local dairy suppliers, such as Foulgers Dairy, not only guarantees fresh products but also supports the local economy.
Promoting a Positive Company Culture
Implementing dairy deliveries in the workplace can also play a significant role in promoting a positive company culture. Here’s how:
- Encouraging Social Interaction: Creating a designated area for employees to enjoy their dairy products can encourage socialisation and foster stronger interpersonal relationships. These informal interactions can enhance team cohesion and collaboration, leading to a more unified workplace.
- Demonstrating Care for Employees: Providing healthy snacks and beverages demonstrates that the company values its employees’ health and well-being. This can build loyalty and trust, making employees feel appreciated and valued.
- Boosting Productivity: A well-nourished workforce is a more productive one. By ensuring employees have access to nutritious options, companies can help maintain high energy levels and mental sharpness throughout the workday, leading to increased productivity and efficiency.
- Cultivating a Health-Conscious Environment: Promoting healthy eating habits such as our workplace fruit delivery can inspire employees to make better nutritional choices outside of work as well. This can lead to a more health-conscious workforce, contributing to overall wellness and potentially lowering healthcare costs for the company.
Explore our wide range of products Our Corporate Deliveries
Enhance Workplace Wellness with Regular Dairy Deliveries From Foulgers Dairy
Incorporating regular deliveries of dairy products into your workplace wellness program is a strategic move that can yield substantial benefits. From improving employee health and morale to fostering a positive and collaborative company culture, the advantages are clear.
Take the next step towards a healthier and happier workplace by partnering with Foulgers Dairy for your corporate dairy delivery needs. Contact us today to learn more about our services and start your workplace delivery program. Your employees will thank you, and your company will thrive as a result.
What Are the Benefits of Fresh Milk?
Purchasing fresh organic bottled milk from a local producer has several benefits over store-bought milk. Here are some of the reasons why you should consider buying fresh milk for yourself.
Lasts Longer
Organic bottled milk is sterilised at very high temperatures before it is sold. This ensures that the milk has a longer shelf life compared to regular store-bought milk. Fresh milk from local dairy producers lasts up to two months longer than store-bought milk, which can prove to be more economical in the long run. In addition, sterilisation allows fresh milk to keep its sweetness for much longer, whereas store-bought milk loses its flavour more rapidly.
More Nutritious
While the high temperatures of sterilisation do lead to the loss of some enzymes and nutrients found in raw and store-bought milk products, it does produce other nutrients that are just as beneficial. Organic bottled milk is high in omega-3 fatty acids, which is a nutrient found in many health foods and supplements. Omega 3 has been shown to reduce heart disease, improve brain functions and development, and help strengthen the immune system.
No Hormones or Antibiotics
Store-bought milk may include antibiotics and growth hormones that have been given to cows to increase their output. Not only are these hormones and antibiotics potentially harmful to the cattle in the long term, they can negatively impact the health benefits of the milk. Organic bottled milk is free of any such hormones or antibiotics as the cattle are never given any of these drugs. All cattle remain drug-free and their milk comes straight from the farm to your door.
Environmentally Friendly
To keep store-bought milk from deteriorating too quickly it is often packaged in plastic cartons with an inert gas injected into the top to stabilise the contents. These plastic containers are often toxic to the environment, don’t break down easily, and can be harmful to wildlife. Fresh milk, however, is often served in glass bottles, which is much better for the environment, with the added benefit of reuse.
Foulgers Dairy
Our milk delivery service offers a wide range of dairy products, including milk, butter, cheese, cream, and yoghurt. You can learn more about our services or receive your first delivery directly from our batch by getting in touch with us today.
Halloween Treats Kids (And Adults) Will Love This Spooky Season
Treat or treat, give me something sweet to eat! Get creative this Halloween with wickedly good, sweet treats that are scary-good and just as easy to make. Whether you’re going all-in and hosting a Halloween party or sharing seasonal snacks with your family after-dinner, this list will delight all your family.
Remember to head to the Foulgers Diary Shop to add the ingredients you’ll need to make and bake these spellbinding goodies!
Terrifying Jam Tarts
This simple jam tart recipe with a Halloween twist from Eats Amazing is tasty enough to satisfy the whole family and easy enough to make with your children.
The colder months are fast approaching and as we see the light nights coming to an end, we will notice temperatures plummeting and weather conditions worsening.
When it comes to this time of year, we all tend to feel a little bit flat, but now there’s increasing evidence that wildlife – and birds in particular – have a profound positive impact on our mental wellbeing.
But it’s not just humans feeling the impact from the change of season – our smaller feathered friends also suffer from the colder months.

Ingredients:
375g pack ready made shortcrust pastry
½ jar Tiptree strawberry jam
edible candy eyeballs
Preparation:
Step 1: Preheat the oven to 180°C. Spray or lightly brush a 12 holed muffin tin with a little oil.
Step2: Roll the pastry out into a thin sheet, then use a large flower cutter to cut flower shapes from the pastry. Be sure to re-roll any scraps of pastry to cut out as many flowers as possible.
Step 3: Push a pastry flower into each section of the muffin tin to make a cup. Pop a spoonful of blueberry jam into each cup.
Step 4: Bake the tarts in the oven for around 15 minutes until the pastry is golden brown and the jam is bubbling. Delicious!
Step 5: Leave to cool in the muffin tin for 5 minutes, then finish cooling on a wire rack. Be careful when removing the tarts from the tin – the jam will be very hot!
Step 6: Once the tarts are cold and the jam has re-set, decorate with the edible eyeballs, and serve.
Crunchy Candy Apples
Synonymous with chillier nights, bonfires, and Halloween, it’s candy apples! Not only are these sweet treats from BBC Good Food dairy-free and vegan, but you can also have lots of fun with vibrant colours to create the perfect crunchy treat this scary season.

Ingredients:
8 red apples
400g caster sugar
1 tsp lemon juice
4 tbsp golden syrup
a few drops red food colouring (optional)
You will also need
8 sticks, chopsticks, or lolly sticks
Preparation:
Step 1: Remove the stalks from the apples, then put them in a heatproof bowl and pour over boiling water from the kettle to cover them and leave for 3-4 mins. Remove with a slotted spoon and pat dry.
Step 2: Push the sharpest end of each stick into the stalk-end of each apple, making sure it’s firmly wedged in. Put a large piece of baking parchment on a board.
Step 3: Tip the sugar into a large saucepan, add the lemon juice and 100ml water. Bring to a simmer and cook until the sugar has dissolved. Swirl the pan gently to move the sugar around, but don’t stir. Add the golden syrup and simmer the mixture (be careful it doesn’t boil over) until it reaches ‘hard crack’ stage or 150C on a sugar thermometer.
If you don’t have a thermometer, test it by dropping a small amount into cold water. It should harden instantly and, when removed, be brittle. If it’s soft, continue to boil. When it’s ready, drip in some food colouring if you like, and swirl to combine. Turn off the heat.
Step 4: Working quickly, dip each apple into the toffee, tipping the pan to cover it fully. Lift out and allow any excess to drip off back into the pan before placing on the baking parchment. Repeat with the remaining apples. Gently heat the mixture again if you need to. Leave to set. Best eaten on the same day.
Ghostly Cookies
From Delicious Magazine, these easy-to-make chocolate cookies look the part and taste just as good! Whether you’ll make and bake spooky ghosts or creepy bats, the choice is up to you. We’re sure that these creepy snacks will be a hit with everyone in the family this Halloween.

Ingredients:
100g softened butter
100g golden caster sugar or light soft brown sugar
A few drops of vanilla extract
1 large free-range egg
240g plain flour, plus extra for dusting
20g cocoa powder
To decorate
icing sugar for dusting
250g pack black and/or white ready to roll icing
1 tube black writing icing
You will also need
Bat and ghost cookie cutters (or make a paper template to cut around with a sharp knife)
2 baking sheets lined with non-stick baking paper
Preparation:
Step 1: Heat the oven to 180°C/160°C fan/gas 4. Put the butter, sugar and vanilla in a large bowl and using an electric hand whisk (or wooden spoon) cream the mixture until pale and fluffy. Add the egg and continue to beat the mixture until mixed in. Sift over the flour and cocoa powder and using a metal spoon fold the ingredients together. Wrap the dough in cling film and put in the fridge for 20 minutes.
Step 2: Sprinkle a little flour over a work surface. Cut the dough into 4 equal portions and roll each piece to 3-4mm thickness.
Step 3: Cut out shapes using cookie cutters (or a paper template), re-rolling any trimmings, then carefully lift onto the baking tray leaving a little space between each biscuit.
Step 4: Bake for 8-10 minutes, depending on the size of the cookies, until golden and cooked. Cool completely on a wire rack.
Step 5: To decorate, roll out the black and white sugar paste icing on a lightly dusted work surface and use the cutter (or paper template) to stamp out bats and ghosts. Use a pastry brush to wet the back of the icing and stick to the cooled biscuits. Decorate the ghosts with black writing icing.
If one of these tasty treats caught your eye, be sure to head over to the Foulgers Diary Shop to stock up on your apples, eggs and butter to make these fa-boo-lous treats!
From everyone at Foulgers Dairy, have a happy Howl-oween!
Finding new ways to use your favourite ingredients isn’t always easy, especially when the best before date is looming! You can easily forget about something in the fridge or get bored of using it the same old way, so getting inventive with your ingredients can help extend their lifespan and let you enjoy something new.
It’s also a great step to reducing your food waste as it is reported that on average a family will discard approximately £810 worth of food each year, so making your products stretch a bit further can help save you money.
There are lots of tip and tricks to try new things and save on food waste, and we’ve rounded up our favouritesfor you to try.
Orange juice
If you want to make a carton of fresh orange juice last longer then there are few things you can do including making ice cubes and ice lollies. Ice cubes can be used in smoothies and the ice lollies are a fun activity for the kids to make and then a tasty reward afterwards.
With BBQ season upon us, you might also want to try giving ribs a squirt of orange juice to give them an extra tangy flavour.
You can also add orange juice to scrambled eggs to make them slightly sweeter – pulp-free is best for this one!
Sparkling water
A nice refreshing glass of sparkling water is always a welcome change from still water, but it can go flat quickly. If you’re worried that you won’t finish your sparkling water try adding it to your cooking. Sparkling can be used instead of still water – try it with pasta, it’s supposed to give it a lighter texture than boiling in still or swap out the milk in pancake batter to make fluffier pancakes.
Yoghurt
Yoghurt is a very versatile ingredient and you can easily use it as a substitute in a lot of recipes. If you’re making scones with a buttermilk recipe, opt for yoghurt instead (with one tablespoon of milk to make it a bit runnier). It’s also ideal for marinades – a great alternative to barbeque sauce on any chicken you’re going to cook on the BBQ over the next few months. Add yoghurt to spices and have a spicy crispy chicken burger perhaps?
This is another one where lollies are a fun treat. Here is a quick recipe (although we think you can use any fruit you like here!)
Ingredients
4 apples
2 tbsp lemon juice
100ml water
100g caster sugar
500g greek yoghurt
1 small handful of strawberries
1 small handful of blueberries
Method
- Peel, core and chop the apples.
- Put in a saucepan with the water, lemon juice and sugar.
- Cover and simmer, stirring occasionally for 15 minutes or until the apples are soft – set aside to cool.
- Put the mixture into a food processor and blend until smooth.
- Fold in the yoghurt.
- Slice the tops off the strawberries and cut them into slices. Fold the strawberry slices and blueberries into the apple and yoghurt mixture.
- Pour the mixture into ice lolly moulds and freeze for 6-8 hours until solid.
Source: https://www.netmums.com/recipes/apple-yoghurt-and-berry-ice-lollies
Milk
Milk is a great source of calcium for not only humans but plants! Calcium deficiency in plants can lead to trouble with shoots growing and issues with leaves and roots. You can also use it on soil as the proteins and enzymes are also good for it.
To use milk as fertilizer (even expired milk), dilute the milk with water and spray on your plant. Leave it for an hour and then wipe away any excess milk from the leaves – you don’t want the milk to sit as this can harm your leaves. Also, make sure that it is a 50/50 mixture of milk and water.
Be sure to do your research to ensure that this is suitable for your plants and soil specifically.
Other tips to help reduce food waste
- Plan out your weekly meals ahead of time so you only buy what you need from us when you order.
- Bulk cook your meals and freeze portions to have later. This helps use up your ingredients so you’re not left with one of something you then end up throwing away.
- Clean cupboards and the fridge regularly, putting the soonest expiration date at the front so you grab it first without having to hunt for it. This is best done when you putting away your food shopping as it’s easier to organise your existing food.
With spring finally here and Easter on its way, the Bank Holiday weekend is going to be one filled with family, friends and food! So, put on a spread to remember with this delicious menu of Easter favourites.
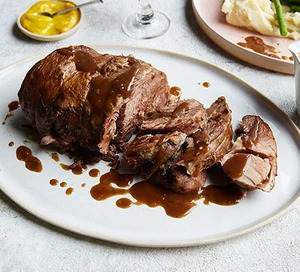
Slow cooker leg of lamb
Ingredients
2 tbsp olive oil
1.3kg boneless leg of lamb, tied
30g unsalted butter
2 tbsp plain flour
300ml lamb stock
200ml red wine
2 red onions, cut into wedges
2 garlic cloves, sliced
5 sprigs of thyme
5 sprigs of rosemary
mashed potatoes and steamed veg, to serve
Method
- Heat the oil in a large non-stick frying pan. Add the lamb and brown on each side for 4-5 mins. Set the slow cooker to low. Melt the butter in a saucepan until foaming, then stir through the flour. Whisk in the stock gradually until incorporated, add the wine and bring to the boil. Set aside.
- Put the onion, garlic, thyme and rosemary into your slow cooker and sit the lamb on top. Pour over the lamb gravy. Put the lid on and cook for 8 hrs or until soft and tender.
- Remove the lamb and set, covered, on a plate. Strain the liquid into a pan and simmer until slightly thickened. Serve the lamb thickly sliced or shredded (it’ll be quite soft) with mashed potatoes, green veg and the gravy.
Source: https://www.bbcgoodfood.com/recipes/slow-cooker-leg-lamb
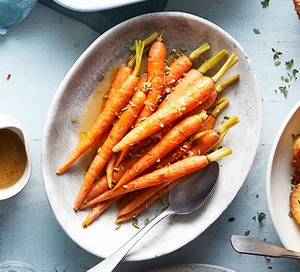
No-peel braised carrots
Ingredients
300ml vegetable stock
300g baby topped carrots
2 tbsp butter
1 tsp caster sugar
1 tsp fennel seeds, crushed
Method
- Heat the vegetable stock, then tip the carrots into a deep-frying pan. Add the butter, sugar, fennel seeds and the hot stock. Season to taste.
- Simmer, uncovered, over a medium heat for 25-30 mins or until the carrots are cooked through and the liquid is reduced and glossy.
Source: https://www.bbcgoodfood.com/recipes/no-peel-braised-carrots
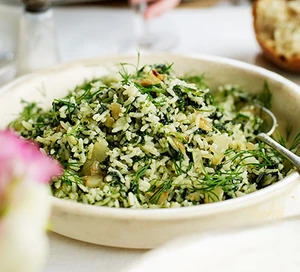
Spinach rice
Ingredients
100ml Greek extra virgin olive oil
1 onion, finely chopped
500g baby spinach leaves, washed and finely chopped
bunch dill, finely chopped
300g long-grain rice
juice 1-2 lemons
Method
- Heat the oil in a large pan, add the onion and gently cook until softened but not coloured. Add the spinach and half the dill. Cook on a high heat, stirring regularly, until the spinach has wilted down and all the liquid has evaporated.
- Stir in the rice and add 600ml water, then bring to the boil. Turn the heat right down again to a very gentle simmer, cover the pan with a tight-fitting lid and cook for 25-30 mins or until the rice has cooked and absorbed all the water. Give it a stir after 15 mins to ensure even cooking, adding a drop more water as required.
- When the rice is cooked, stir in the remaining dill, season well, squeeze over the lemon juice to taste, and serve.
Source: https://www.bbcgoodfood.com/recipes/spinach-rice
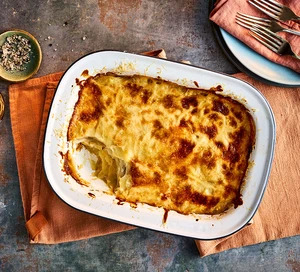
Scalloped potatoes
Ingredients
50g unsalted butter, plus extra for the dish
1 onion, thinly sliced
2 garlic cloves, chopped
50g plain flour
500ml whole milk
250ml chicken or vegetable stock
1kg potatoes, thinly sliced (use a mandoline for the best results)
75g parmesan, finely grated
Method
- Heat the oven to 180C/160C fan/gas 4 and butter a deep 20 x 30cm baking dish. Melt the butter in a pan over a medium heat and cook the onion and garlic with a pinch of salt for 8-10 mins until the onion has softened slightly. Tip in the flour, stir well, then cook for a few minutes more. Mix the milk and stock together, then gradually pour this in, whisking well between additions until everything is incorporated and you have a smooth sauce. Simmer for a few minutes, then season well.
- Lay half the sliced potatoes in a single layer in the buttered dish, slightly overlapping them if needed. Pour over half the sauce, then scatter over half the parmesan. Arrange the remaining potatoes on top, then pour over the remaining sauce and scatter with the remaining parmesan. Cover with foil and bake for 1 hr, then remove the foil and bake for another 30 mins until golden on top.
Source: https://www.bbcgoodfood.com/recipes/scalloped-potatoes
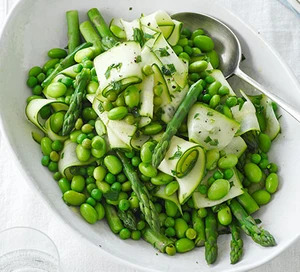
Spring vegetables
Ingredients
2 large courgettes, sliced into ribbons with a vegetable peeler
juice 1 lemon
200g asparagus spears, washed and trimmed
100g frozen peas
100g frozen broad beans
1 tbsp extra virgin olive oil
small pack parsley, roughly chopped
Method
Put the courgette ribbons in a large bowl with a pinch of salt and the lemon juice.
Bring a large saucepan of water to the boil and cook the asparagus for 2 mins, adding the frozen peas and broad beans for the final min. Drain well, pod the broad beans and toss together with the courgette ribbons. Drizzle over the olive oil, sprinkle on parsley and season to taste.
Source: https://www.bbcgoodfood.com/recipes/warm-spring-vegetables
SWEET EXTRAS

Hot cross buns
Ingredients
For the buns
300ml full-fat milk , plus 2 tbsp more
50g butter
500g strong bread flour
1 tsp salt
75g caster sugar
1 tbsp sunflower oil
7g sachet fast-action or easy-blend yeast
1 egg , beaten
75g sultanas
50g mixed peel
zest 1 orange
1 apple, peeled, cored and finely chopped
1 tsp ground cinnamon
For the cross
75g plain flour, plus extra for dusting
For the glaze
3 tbsp apricot jam
Method
- Bring 300ml full-fat milk to the boil, then remove from the heat and add 50g butter. Leave to cool until it reaches hand temperature. Put 500g strong bread flour, 1 tsp salt, 75g caster sugar and 7g sachet fast-action or easy-blend yeast into a bowl. Make a well in the centre. Pour in the warm milk and butter mixture, then add 1 beaten egg. Using a wooden spoon, mix well, then bring everything together with your hands until you have a sticky dough.
- Tip on to a lightly floured surface and knead by holding the dough with one hand and stretching it with the heal of the other hand, then folding it back on itself. Repeat for 5 mins until smooth and elastic. Put the dough in a lightly oiled bowl. Cover with oiled cling film and leave to rise in a warm place for 1 hr or until doubled in size and a finger pressed into it leaves a dent.
- With the dough still in the bowl, tip in 75g sultanas, 50g mixed peel, zest of 1 orange, 1 finely chopped apple and 1 tsp ground cinnamon. Knead into the dough, making sure everything is well distributed. Leave to rise for 1 hr more, or until doubled in size, again covered by some well-oiled cling film to stop the dough getting a crust.
- Divide the dough into 15 even pieces (about 75g per piece). Roll each piece into a smooth ball on a lightly floured work surface. Arrange the buns on one or two baking trays lined with parchment, leaving enough space for the dough to expand. Cover (but don’t wrap) with more oiled cling film, or a clean tea towel, then set aside to prove for 1 hr more.
- Heat oven to 220C/200C fan/gas 7. Mix 75g plain flour with about 5 tbsp water to make the paste for the cross – add the water 1 tbsp at a time, so you add just enough for a thick paste. Spoon into a piping bag with a small nozzle. Pipe a line along each row of buns, then repeat in the other direction to create crosses. Bake for 20 mins on the middle shelf of the oven, until golden brown.
- Gently heat 3 tbsp apricot jam to melt, then sieve to get rid of any chunks. While the jam is still warm, brush over the top of the warm buns and leave to cool.
Source: https://www.bbcgoodfood.com/recipes/hot-cross-buns

Easter biscuits
Ingredients
300g plain flour, plus extra for dusting
150g white caster sugar
150g slightly salted butter, chopped
1 large egg
2 tsp vanilla extract or vanilla bean paste
For the iced option
500g royal icing sugar
your favourite food colouring gels
For the jammy middle
Icing sugar, for dusting
400g apricot jam, or lemon curd
Method
- Weigh the flour and sugar in a bowl. Add the butter and rub together with your fingertips until the mixture resembles wet sand, with no buttery lumps. Beat the egg with the vanilla, then add to the bowl. Mix briefly with a cutlery knife to combine, then use your hands to knead the dough together – try not to overwork the dough, or the biscuits will be tough. Shape into a disc, then wrap in cling film and chill for at least 15 mins. Heat oven to 180C/160C fan/gas 4. Line two baking sheets with baking parchment.
- Dust a work surface with flour. Halve the dough, then roll one half out to the thickness of a £1 coin. Use an egg-shaped cookie cutter (ours was 10cm long; you could also make a cardboard template to cut around) to stamp out as many cookies as you can, then transfer them to one of the baking sheets, leaving a little space between the biscuits. Repeat with the other half of the dough. If you want to make jammy biscuits, use a small circular cutter to stamp holes in half of the biscuits (where the yolk would be). If you intend to make both iced and jammy biscuits, only stamp holes in a quarter of the biscuits.
- Bake for 12-15 mins, until the biscuits are pale gold. Cool on the sheets for 10 mins, then transfer to a wire rack to cool fully. Once cool, decorate to your liking (see next steps). Will keep in an airtight container for up to five days.
- To decorate the biscuits with icing, add enough water to the icing sugar to make a thick icing – it should hold its shape without spreading when piped. Transfer about a third of the icing to a piping bag fitted with a very small round nozzle (or just snip a tiny opening at the tip). Pipe an outline around the biscuits, then draw patterns in the middle – lines, spots and zigzags work well. Leave to dry for 10 mins. Divide the remaining icing between as many colours as you’d like to use, then use the gels to dye them. Loosen each icing with a few drops of water, then transfer them to piping bags. Use the coloured icing to fill the empty spaces on the biscuits. You may need to use a cocktail stick to tease it into the corners. Once covered, leave to dry for a few hours.
- To make the jammy middle biscuits, dust the biscuits with holes in the middle with a heavy coating of icing sugar. Spread the jam or curd generously over the whole biscuits, then sandwich the dusted biscuits on top of them.
Source: https://www.bbcgoodfood.com/recipes/iced-easter-biscuits

